App Store Increased Subscription Price notification

App Store Increased Subscription Price notification.

iOS and iPadOS 14 will inform you whenever a third-party app that you’re subscribed too, increases its subscription price! A prompt is displayed on your iPhone or iPad screen mentioning the name of the app in question, the type of the subscription that’s getting the price increase, as well as the full details about the old and the new costs.


The default subscription price increase prompt reads like this:

[app name] is increasing its subscription price per [duration] from [former price] to [new price].

Tap Review, to read more info about the reported price increase and even cancel your upcoming renewal, if you’re not willing to pay the higher price.
You can also tap on Not Now and dismiss the alert if you’re OK with the change or don’t have the time to address this.

How To Manage App Store Subscriptions

If you accidentally pressed Not Now, and are looking for a way to read more about the subscription’s rate increase and even cancel it here is what to do:

how to manage App Store subscriptions


  • 1. Open App Store on your iPhone and iPad.
  • 2. Tap on your Profile‘s icon, upper-right corner of the screen.
  • 3. Open Subscriptions.
  • 4. Tap on the app name, in the Active subscriptions list.
  • 5. Review the new fee and Cancel Subscription if you don’t accept it!

Increasing subscription price notifications are mandatory in iOS 14! Third-party apps have to let their users know whenever a price increase is operated. This way ripoffs are avoided! Have you already been prompted with an alert about a subscription that changed its price? Let us know using the comments section available below.

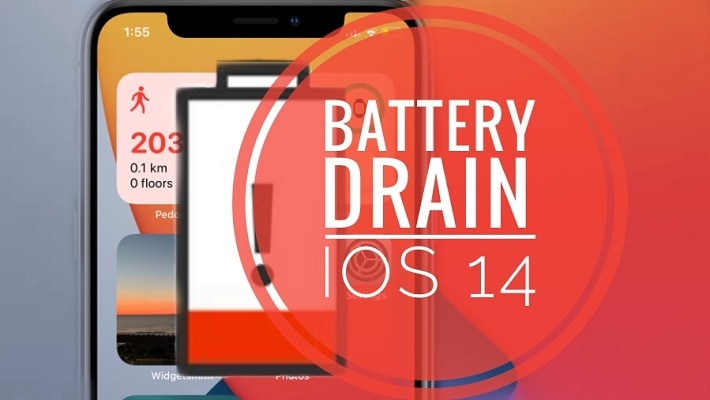
Increased Battery Drain in iOS 14 and watchOS 7

Increased Battery Drain in iOS 14 and watchOS 7.

Are your iPhone and Apple Watch experiencing increased battery drain ever since you updated to iOS 14 and watchOS 7? Apple has recently acknowledged the problem and released a support document that provides a solution for this and a series of other glitches including missing GPS mapping during workouts and other data missing from the Fitness app.


Apple recommends to unpair Apple Watch, back up both your iPhone and wrist-worn device, erase both of them and restore from backups.

Common iOS 14 and watchOS 7 Problems

The troubleshooting sequence should be applied if your devices experience two or more symptoms from the following list:

  • Increased battery drain on iPhone or Apple Watch, or both.
  • Missing workout maps in the Fitness app on iPhone for workouts recorded with your Apple Watch, with GPS-enabled.
  • Activity, Heart Rate, or other health-related apps don’t work or load data on Apple Watch.
  • Fitness app and/or Health app fail to launch or update data on iPhone.
  • The Health app and/or Fitness app is reporting an unreal amount of data storage on your iPhone.
  • The Activity app is showing wrong amount of data storage on your Apple Watch.
  • Environmental sound levels data and/or headphone audio levels data from Apple Watch is missing in the Health app on iPhone.

How To Unpair Apple Watch

how to unpair Apple Watch

    • 1. Open Watch app on the paired iPhone.
    • 2. In the My Watch tab, tap on All Watches.
    • 3. Tap on the ‘i’ icon, next to the watch that you want to unpair.
    • 4. Use the Unpair Apple Watch option.​

Fact: Before your Apple Watch is erased, the iPhone creates a new backup of your device, which you can use later on to restore your smartwatch from.

How To Create iPhone Backup

With iCloud

how to backup iPhone with iCloud

    • 1. Open Settings on your iPhone.
    • 2. Tap your name, available at the top of the screen.
    • 3. Open iCloud.
    • 4. Make sure that Health is enabled, or tap the toggle to turn it ON.
    • 5. Tap on iCloud Backup.
    • 6. iCloud Backup has to be switched ON.
    • 7. Tap Back Up Now and be patient until the backup is completed.

Tip: Double-check to see if the Health data is backed up, in the Health app. Tap on your profile icon, in the top-right corner of the screen. Check the bottom of the screen, and find out when your data was last backed up. If the time is recent you’re good to go, else you have to wait a bit more and check again

With iTunes

You can also perform a full iPhone backup on your computer via iTunes. For more details please tap here.

How To Erase iPhone

With the backups in place you can proceed and wipeout your iOS 14 device:
how to erase iPhone

  • 1. Open Settings.
  • 2. Tap on General.
  • 3. Scroll for Reset.
  • 4. Use the Erase All Content and Settings option.

How To Restore iPhone & Apple Watch From Backup

First restore your iPhone and then your smartwatch as follows:

  • 1. Reboot your iPhone and restore it from your iCloud backup or from the iTunes one, depending on what method you used.
  • 2. After you iPhone restore is completed, open the Watch app.
  • 3. Tap on Start Pairing and wait for the process to complete.
  • 4. Use the Restore from Backup option and select the most recent backup available, when restoring.
iOS 13 Find My App.

iOS 13 Find My App.

Apple has decided to merge the Find My Friends and Find My Phone app into a single software intuitively named ‘Find My’. Starting with iOS 13you have a single place where you can search for a lost Apple device or a friend. Besides joining the apps the Cupertino-based tech giant has added a handy new feature that allows you to find misplaced devices even if they’re not connected to a Wi-Fi or cellular network. ‘Find My’ is compatible with iPhone, iPad, Macs, Apple Watch and AirPods.

This is achieved with the help of crowd-sourced location information obtained through the Bluetooth signals of the nearby devices. The Bluetooth signal issued by your device, an iPhone for example, can be picked up by other nearby Apple terminals and relayed back to your Macbook, allowing you to start searching for the missing device. The Find My system comes with end-to-end encryption, meaning that others can’t get the location info and nor can Apple. Your lost devices can only be tracked down by you. For this to work, they need to be connected to the same Apple ID. Of course, you need at least two Apple devices, the lost one and the one used for tracking.

How To Locate Friends and Family With Find My
Find People with Find MyThe Find My app is split into three categories. On the home screen, you can find three tabs at the bottom: People, Devices and Me.
The People tab allows you to locate friends that are sharing their location with you. Their whereabouts are shared on a map. Below the chart, you will find a list of the identified persons as well as info about how far away they are.
Tap an entry to unveil more options. Get directions, contact or schedule a notification for when the person leaves the current location.

How To Find Lost Devices
Find Devices in Find My AppIn the Find My app tap the Devices tab and the list with all your devices will be displayed, just below the map. You can zoom in and out of the map to get a better view of the location. Tap the missing device and you will get the following options: Play Sound, Directions, Notifications, Mark as Lost and Erase this Device.
Directions: Provides valuable info about the location of the missing iOS terminal.
Play Sound: Generates a beeping alert to allow you to detect the exact position of the device.
Notifications: Will generate an alert on your iPhone if the missing device is found and is offline.
Mark as Lost: This will lock your device, disables Apple Pay and brings up contact information on the Lock Screen. As a last resort, there is an option to delete all the data on the device.

The Find My – Me – Tab
Me Tab in Find My appThe third tab of the Find My app provides info about your current location. It also includes toggles for sharing your location and for receiving friend requests. You can also tweak the location updates setting. Do you want to get location updates from everyone that is sharing the location with you or just with specific persons?
Last but not least you have the option to name the current location to make it easier to recognize on the map.

How Apple Devices Without Wi-Fi Or Cellular Data Are Tracked
As mentioned at the start of this article the most interesting new feature of the new Find My app is the option to track devices even if they’re not connected to WiFi or cellular data. However, for this to work you still need an active Bluetooth on the missing device. This means that if the device is powered off, you will be only able to see the last tracked location before the battery died or Bluetooth was turned off. In the Devices list, terminals that are offline have the distance from you displayed with grey color instead of blue. Currently, there is no way to differentiate tracking of the devices. There is no mention that the device was tracked via Bluetooth or thanks to Wi-Fi or cellular data.

Fact: Apple claims that the Find My app isn’t resource intensive. It uses just small junks of data from existing network traffic. This means that it won’t have a significant effect on battery drainage, data usage, and privacy.

Tip: If you have the Family Sharing option enabled all other family devices will be listed below your own devices in the ‘Find My’ app.

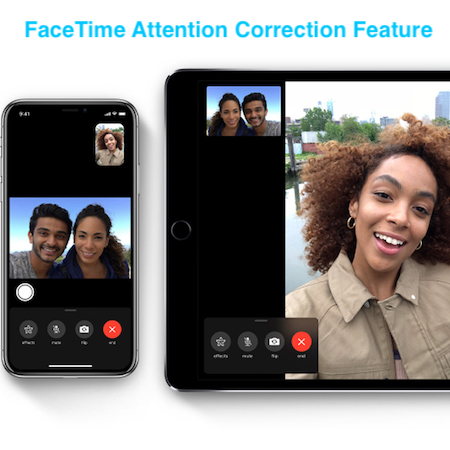
FaceTime Attention Correction Feature on iPhone and iPad

FaceTime Attention Correction Feature on iPhone and iPad.

Another interesting new feature coming along iOS 13 is FaceTime Attention Correction. Its role is to make FaceTime video calls more personal by artificially adjusting the set of your eyes so that it helps you to make eye contact with your caller. You probably noticed that every time you are engaged in a FaceTime video call the conversation partner/partners don’t look you directly in your eyes. Naturally, everyone looks at the iPhone’s, iPad’s or at the Mac’s screen, because they want to see what happens at the end of the line.

In order to make eye contact with the other persons, you would need to look both at the device’s camera so that the conversation partner perceives you at looking in their eyes. However, if you do this you won’t be able to see him or her because you can’t look at the same time at the iPhone’s screen and into its cameras. It’s an angle difference that prevents natural eye contact.

FaceTime Attention Correction Feature

How It Works
Starting with iOS 13 Apple has a solution for this small inadvertence. Through a combination of hardware and software improvements compatible iPhone and iPad, models are able to use the front-facing TrueDepth camera to capture an ARKit depth map and artificially “adjust” your eyesight to create the impression that you’re looking at the camera even if you are actually gazing at the iPhone’s screen.

Facetime Attention Correction option in iOS 13 SettingsHow To Set Up
The FaceTime Attention Correction feature is optional. It’s currently not enabled by default. You can turn it on from Settings -> FaceTime -> FaceTime Attention Correction and disable it whenever you want.

Compatibility
You need to own an Apple device equipped with TrueDepth camera hardware and enough image processing power. This means that this feature is compatible with iPhone XR, iPhone XS, iPhone XS Max, and the 2018 iPad Pro models. Your device needs to run iOS 13 or later and iPadOS or later.
Fact: the FaceTime Attention Correction feature doesn’t need both participants to own compatible devices.

Debate
Ever since the announcement of this new feature, an interesting debate has started on the online forms. Is FaceTime Attention Correction actually making the conversation more personal, or it’s actually faking the way you look at your conversation partner? Will we end up in the near future video calling someone and appearing to make eye contact while doing something completely else in the background? Do you plan to use this feature or will keep it disabled?

After years of complaints and shortcomings, Apple has finally listened to the voice of millions of iPhone users that have unanimously complained about the obtrusive Volume interface that pops up in the middle of the iPhone screen whenever you’re watching a video and are trying to adjust the Volume. In iOS 13 gone are the moments when the huge square snapped Volume HUD invades the middle of your iPhone’s display.

The iPad was using the same graphics, however, because of the larger screen size, the old Volume indicator was less obtrusive. In iOS 13 the redesigned Volume HUD is rectangular shaped, oriented vertically and pops up on the left edge of the screen when the iPhone is held in portrait position. It shows up, right next to the physical Volume Up and Down buttons. The new Volume interface becomes even smaller and shrinks to a bar right after it pops up and you continue the adjust the loudness of your iPhone. The new design is slick and unobtrusive. Why did Apple needed several years, to improve this feature? I can’t seem to find a logical answer. Anyhow, it’s better late than never! Right?

iOS 13 new Volume hudiOS 13 New Volume Hud Appearance
Nearby you can have a look at the redesigned iPhone Volume interface. In landscape mode, the rectangular bar pops up, centered, at the top of the screen. It shrinks down as you continue to adjust the loudness.
Fact: At the time of writing there are 34 volume levels to choose from.

iOS 13 Volume Hud Gesture Trick
Besides fine-tuning the Volume levels from the classical buttons you can also apply slide gestures because the Indicator is responsive! Drag the Volume bar up or down (left or right when in landscape) to the desired intensity. Click one of the Volume buttons once, and after the Indicator pops up to use your finger to quickly bring up or down the loudness to the desired levels.
Fact: The fastest way to completely silence your iPhone is still done with the help of the Silent switch available just above the Volume buttons.

iOS 13 Volume HUD On Jailbroken iOS Devices
If you’re using a jailbroken iPhone running iOS 11 or iOS 12 you can now grab the redesigned iOS 13 Volume HUD thanks to a jailbreak tweak provided by developer iKilledAppl3.
Fact: The difference between this jailbreak tweak and the original behavior of the new Volume Hud is that the bar doesn’t shrink and it’s also not responsive to the gesture trick described above.