how to fix your iPhone screen

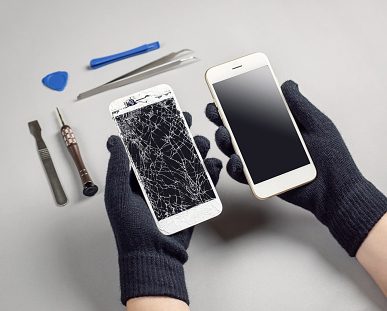
At some point, every iPhone user experiences the frustration of a cracked screen. Whether you dropped your phone or accidentally sat on it, a cracked screen can be a real annoyance. If you’re a Charlotte NC resident and looking for a reliable solution to fix your iPhone cracked screen, you’ve come to the right place. Go Mobile Cell Phone Repair Store has got you covered. In this guide, we’ll cover everything you need to know about fixing your iPhone screen and restoring it to its former glory.

  1. Assess the Damage The first step in fixing your iPhone cracked screen is assessing the damage. If your screen is shattered, you’ll need to replace it entirely. If it’s just a small crack, you may be able to get away with a quick fix. Take a close look at your screen to determine the extent of the damage.
  2. Back Up Your Data Before you attempt any repairs on your iPhone, it’s important to back up all of your data. This includes contacts, photos, music, and any other important files. Backing up your data ensures that you don’t lose any information during the repair process.
  3. Replace the Screen If your iPhone screen is completely shattered, you’ll need to replace it. While you could take your phone to a professional repair shop, Go Mobile Cell Phone Repair Store offers a fast and reliable solution for Charlotte NC residents. Our experienced technicians will replace your cracked screen with a high-quality replacement screen to ensure the best results.
  4. Fix a Small Crack If you have a small crack in your iPhone screen, you may be able to fix it yourself. One popular DIY solution involves using toothpaste to fill in the crack. While this may work temporarily, it’s not a long-term fix. For a more permanent solution, you can bring your phone to Go Mobile Cell Phone Repair Store, where our technicians will fix the small crack in no time.
  5. Prevention is Key The best way to avoid a cracked screen is to prevent it from happening in the first place. Invest in a high-quality phone case that offers ample protection for your device. You should also avoid leaving your phone in areas where it’s likely to be knocked off a surface, such as the edge of a table or countertop.

In conclusion, if you’re a Charlotte NC resident in need of a reliable solution to fix your iPhone cracked screen, Go Mobile Cell Phone Repair Store is here to help. Whether you need a complete screen replacement or a quick fix for a small crack, our experienced technicians will provide fast and reliable service to get your device back to working order. And of course, prevention is always the best course of action when it comes to avoiding a cracked screen.

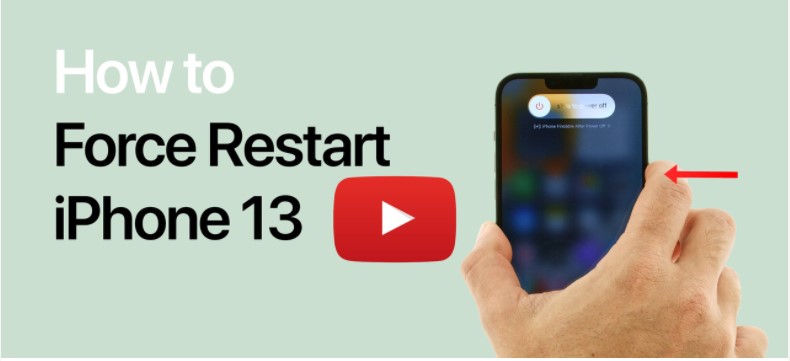
How to Force Restart Your iPhone 13

How to Force Restart Your iPhone 13

These are instructions on how to force restart your iPhone 13, iPhone 13 Pro, iPhone 13 Pro Max, and iPhone 13 mini.

You may need to follow these steps if your iPhone has become unresponsive.

Step One
Press and release the Volume Up button then press and release the Volume Down button.

How to Force Restart Your iPhone 13 [Video]

Step Two
Quickly press and hold down the Side button until the Apple logo appears.

How to Force Restart Your iPhone 13 [Video]

Step Three
Your iPhone will now reboot.

How to Force Restart Your iPhone 13 [Video]

Please follow Go Mobile on TwitterFacebook, for more Apple news, videos, and tutorials.

Untitled 2

If you can’t charge your iPhone or iPad, whether it’s the latest iPhone 12 or iPad Pro, or an older iPhone 6s or iPad Air, there’s a lot you can try on your own before contacting Apple for help. Sure, sometimes it’s a hardware problem with the Lightning or USB-C connector or the battery, but often enough it’s a software issue that a few simple steps can fix.

If so, follow along and we’ll get you back up and battery running in no time!

1. Force a restart

If your iPhone or iPad won’t charge, one of the first and easiest things to try is a forced restart. Make all the “reboot Windows” jokes you want but sometimes bad bits get stuck and need to be flushed out. Follow these instructions to force a reboot, or even reset your iPhone.

2. Switch outlets or ports

Funny as it sounds, sometimes outlets or USB ports just don’t work. That’s especially true if you’re plugging into a wall or computer you’ve never plugged into before. It can also happen if an electrical or other problem occurs in your regular outlet or port.

So, make sure you try plugging into a different outlet or USB port and see if your iPhone or iPad starts to charge. If it does, you’re good. If not, keep reading.

3. Switch cables

Like outlets, cables can fail. Sometimes they get chewed up by the wear and tear of travel or even household life. Other times, especially for third party cables, defects catch up with them. If there’s no problem with the iPhone or iPad, and no problem with the power source, you need to check the cable in-between.

Try a different cable. If you don’t have one handy, try one from a family member, friend, schoolmate, colleague, or even one from a store in the mall. Just get your hands on a cable or two other than your regular and see how goes. If it works, awesome. If not, keep reading.

4. Restore in iTunes

After trying the easy fixes, it’s time to try the harder ones. In this case, restoring your iPhone or iPad in Finder (on your Mac) or iTunes (on Windows and older Macs. A computer-based restore is a safer bet than iCloud because it actually offloads, re-installs, and reloads your data rather than doing everything in-place and on your device. That can sometimes shake loose bad bits that even a forced restart or iCloud restore can’t. If you use an encrypted backup, it’ll even restore your passwords so you can get back up and running faster.

You’ll need to back up your device to your Mac, then erase it, then restore it.

5. Contact Us

Sometimes a problem really is a problem. Like any physical connector, the Lightning or 30-pin Dock port is subject to both wear-and-tear and electrical failure. There could also be an issue with your battery. If you have AppleCare+, don’t walk, run to get it fixed. If you don’t, get in touch with us we offer a free estimate and free diagnosis then you can weigh the cost of repair against the cost of upgrading to a new device.

Your fixes?

It doesn’t matter if your iPhone is older, or the best iPhone you can buy right now, problems can still arise. If you had an iPhone, iPod touch, or iPad that you couldn’t charge, and one of the above fixes worked for you, let me know! If something else worked, let me know that as well!

Contrary to what many people thought of display issues like screen flickering being caused by a damaged screen component, software-related factors like iOS bugs can also trigger occurrence of these symptoms. As a matter of fact, display issues including a flickering display have emerged among the post-update issues raised by some iPhone owners after installing new update to iOS. If for some reason you would end up facing the same problem on your new iPhone after updating to iOS version 13.2.3, this post highlights some potential solutions for you to try on. Read on to find out how to deal with screen flickering issue on your iphone 11 Pro following the recent iOS update installation.

Troubleshooting iPhone 11 Pro screen flickering issue after iOS update

The following procedures will help rule out any iOS bugs that might have ruined your iPhone’s display system and trigger the screen to flicker. You can try all these methods before taking your iPhone to a service center.


First solution: Restart your iPhone.

Different issues could instigate from an iOS update and atypical display behaviors like screen flickering are among them. Often times, the transpiring symptoms are due to some minor post-update flaws and therefore can easily be remedied by rebooting the iPhone. That said, performing a soft reset is the first recommended solution for you to try. This will help clear out random system caches and post-update errors that caused the display system to suddenly become unstable. It doesn’t affect any saved information on your iPhone, so you don’t need to back up files beforehand. Just follow these steps:

  1. Simultaneously press and hold the Side and Volume Up buttons for a few seconds.
  2. Release both buttons when the Slide to Power off bar appears.
  3. Swipe or drag the bar to turn your device off.
  4. After about 30 seconds, press and hold the Side button and then release when the Apple logo appears.

Try to observe how your iPhone screen behaves after the soft reset. If screen flickering continues, try other options to rule out other possible triggers.

Second solution: Adjust your iPhone’s screen brightness.

Some iPhone owners who have faced with the same display issue after an iOS update installation were able to find temporary remedies by adjusting their phone’s screen brightness. To see if this tweak will deliver positive results, try to adjust the screen brightness of your iPhone 11 Pro with these steps:

  1. From the Home screen, tap on Settings.
  2. Scroll down and tap Display & Brightness.
  3. Drag the slider under Brightness to the left or right to reduce or increase screen brightness.

You can also enable Auto-Brightness to let your device adjust the display brightness based on its surroundings. Simply toggle the switch next to Auto-brightness to turn the feature On.

Another temporary solution to post-update display issues, particularly those depicted by screen flickering symptoms is to enable reduce transparency on your phone. Doing so enhances contrast to some backgrounds and thereby augmenting legibility. Here’s how to activate this feature on your iPhone 11 Pro:

  1. From the Home screen, tap Settings.
  2. Select General.
  3. Scroll down to and tap on Accessibility.
  4. Select the option to Increase Contrast.
  5. Then toggle the Reduce Transparency switch to enable the feature.

See if any of these tweaks is able to stop the screen flickering symptoms on your device.

Third solution: Check and manage internal memory.

Screen flickering can also occur among other performance issues attributed to insufficient memory or low storage space. While this isn’t likely applicable to your iPhone given that it’s new and packed with bigger storage capacity, similar issues can also be triggered if any of your downloaded apps is acting up and using up a significant amount of storage. To clear this out, follow these steps to check and manage memory status of your iPhone 11 Pro:

  1. From the Home screen, tap on Settings.
  2. Select General.
  3. Tap iPhone Storage.
  4. Tap the option to view more information on the Used storage and Available Memory.

You can also view how much memory each app has used. If necessary, delete all unused apps to free up memory space on your device.


Fourth solution: Reset all settings on your iPhone 11 Pro to fix screen flickering issue after updating.

Eliminating invalid system settings can also help fix the problem, especially if some critical settings were overwritten by the recent update and that resulted in some conflicts. There’s no need to worry of losing important files afterwards because this reset does not affect the internal data. However, all your current system settings and customized options are deleted. Just follow these steps if you wish to proceed with this reset:

  1. From the Home screen, tap on Settings.
  2. Select General.
  3. Scroll down and tap on Reset.
  4. Tap Reset all settings from the given options.
  5. Enter your passcode if prompted to continue.
  6. Confirm action by tapping the option to reset all settings on your device.

After the reset, all default values and options are restored, so you will need to re-enable necessary features, particularly those that are disabled by default.


Fifth solution: Restore your iPhone to its factory default settings (factory reset).

A factory reset wipes everything from your iPhone storage including saved apps, contacts, customized settings, and personal information. Any complex system errors inflicted by the recent iOS update implementation that trigger screen flickering issue will also be deleted in the process. Any other associated symptoms are also fixed. But the main downside you should note is on permanent data loss. That said, creating a backup is highly recommended before you proceed with this reset. Once you’ve secured your backup file, follow these steps to factory reset your iPhone 11 Pro through settings menu:

  1. From the Home screen, tap on Settings.
  2. Select General.
  3. Scroll down and tap on Reset.
  4. Tap Erase all content and settings from the given options.
  5. Enter your passcode if prompted to continue.
  6. Confirm action by tapping the option to erase and reset your iPhone

Alternatively, you can use iTunes to manually erase and restore your iPhone system from a previous iOS backup through a computer.

Last resort: Restore your iPhone from an iOS backup (system downgrade).

Resorting to an iOS downgrade can be considered among the last options if all else failed to fix the problem. This can be deemed a better move while waiting for Apple to issue anew fix patch. The following steps will walk you through restoring your iPhone 11 Pro from a previous backup via recovery mode. This however is only possible if you’ve managed to backup your iPhone data on your computer before updating to iOS 13.2.3. If you did, then you may start restoring your iPhone whenever you’re ready:

  1. Connect your iPhone to a computer using the original USB cable or Lightning cable that came with it.
  2. Open iTunes on your Windows and/or earlier Mac computer or Finder app on your Mac running macOS Catalina.
  3. While your device is connected, quickly press and release the Volume Up key.
  4. Then quickly press and release the Volume Down key.
  5. Next, press and hold the Side button until the Connect to iTunes or recovery mode screen appears. Do not release the button if you  see the Apple logo as you’ll need to boot your phone in recovery mode.

Shortly after you see the Connect to iTunes screen, you will be prompted with the next instructions via message prompts. If prompted to Update or Restore your iPhone in iTunes, select Restore to erase your device and restore it from a recent iOS backup saved on your computer drive via iTunes.


What to do if screen flickering issue continues on your iPhone 11 Pro?

You can also use third-party tools to fix screen flickering and other post-update display issues on your iPhone without deleting any personal information.

Here at Go mobile, we could take care of it, however, since you red all the article, we would like to have your bussiness by offering you one time discount for repairing you iPhone 11 Pro screen flichering issue, just mention the coupon ( FARgomobilenc) so you will get %15 discount

thanks

30366 49749 Screen Shot 2019 03 28 at 124437 PM l

A new report has unearthed details about a “Apple Genuine Parts Repair” program, which puts Apple service materials in the hands of some companies with fewer restrictions than current service providers may be under.

30366 49749 Screen Shot 2019 03 28 at 124437 PM l

Apple has had a path for companies to become an authorized service provider for decades, with requirements for the program varying dramatically across the years. The new “Apple Genuine Parts Repair” program may be lightening that up somewhat, but there are few firm details on what Apple will require to qualify for the new program.

The report, and leaked presentation slides, published by Motherboard, suggests that the program is already in place at a few vendors. Vendors cited are Mobile Kangaroo in California, Simple Mac in Salt Lake City have access to the program, as well as Makina Technologies in Dubai.

Alleged slide from

Alleged slide from “Apple Genuine Parts Repair” presentation

The program appears to specifically allow repair shops to do things that Apple-authorized centers have been doing for years, without telling Apple. For instance, there are specific prohibitions on swapping in a “known-good” component not from Apple’s stock for troubleshooting, requiring a service replacement part be ordered first.

Specifically, the presentation slides say that providers can “keep doing what you’re doing, with Apple genuine parts, reliable parts supply, and Apple process and training.” Additionally, the details don’t limit the parts to iPhone, iPad, or Mac and include all three.

How the system works now, and where it may change

At present, for most authorized service centers, few if any parts are kept in stock. The remainder are ordered after the diagnostic process is complete, and shipped FedEx to the repair shop. The shop performs the repair, and must return the “core” failed part to Apple for examination, refurbishment and return to service stock, or both.

In the case of a warranty repair, Apple picks up the tab for the difference between the core price and the non-return price. Otherwise, the shop pays the bill, which is then passed to the customer. Core prices are often up to 75 percent the cost of the whole part, ordered new. So, part accountability is important, and Apple has put prohibitions in place to prevent shops from selling directly to customers as a result of abuse in years gone by.

Shops selling parts to users is grounds for a loss of Apple-authorized status — which can be financially deadly. At present, it isn’t clear if the requirement for service centers to perform a “core” swap is retained in the new program, nor if they will be allowed to sell parts directly to customers. It doesn’t seem likely that Apple will loosen either requirement.

It also isn’t clear if there will be an upper line that these providers can’t cross. For instance, Apple may choose to retain the hardware for linking parts after a repair involving something involving the secure enclave is performed. Board-level repair, such as that performed by Louis Rossmann is likely to be frowned upon as well.

Immediate reaction

Apple repair venue iFixit doesn’t think the rumored program goes far enough.

“To start, Apple’s plan appears to be rather limited. We know they’ve talked to big repair chains, but they have not spoken to any of the smaller repair shops we contacted,” wrote iFixit in a post on Thursday afternoon. “If only the large national chains get access to these parts, the independent shops—… get left out in the cold, and will likely lose business as a result. This continues to encourage a repair monoculture that stifles competition, job creation, and innovation in the repair space.”

“Apple would like you to think that independent shops are a sketchy, dangerous minefield of service options that use low-quality parts that can lead to problems down the line. And in some cases, that may be true—but that’s Apple’s fault, not the repair shops’,” iFixit continues. “If Apple would just provide OEM parts to independent repair shops at a reasonable price, these risks would be far smaller.”

Potential sea-change, if accurate

AppleInsider has reached out to Apple for comment, but has not as of yet received a response. Third-party vendors we spoke to after the report was published said that they had heard “rumblings” that such a thing was in the works, but denied having any knowledge that it was imminent.

If the report is completely accurate, it would be the biggest shift in Apple’s repair policies since it started enforcing the rules on authorized repair centers in 1979.

Apple has historically opposed right-to-repair laws in places like California, claiming it would expose company secrets and create safety and security problems. While there are innumerable third-party Apple repair firms around the world, only Apple and its authorized service providers are able to perform full service in a way that doesn’t void warranties. Presently, the company doesn’t provide parts or repair manuals outside of its official network.

Twenty U.S. states have some form of right-to-repair legislation under consideration. Apple is one of several tech companies lobbying politicians to act in its favor.

iphone xr with black screen issue

This post is generated by a recent event that occurred to one of our iPhone models. The XR stopped working all of a sudden and displayed a black screen as if the device shutdown out of the blue. The iPhone XR did not react to the Raise to Wake gesture, to Side Button presses, nor to any other taps on the screen. I have to mention that the battery levels were high (around 80%) before this happened.

The iPhone seemed turned off, and I started considering a shortcut in the battery because it seemed totally dead, as if I was holding a brick in my hand. However, I found out later that it wasn’t the case because I left it to rest for a while and when I picked it up to see if it got resurrected, the brick was warm which means that some kind of loop was definitely ongoing in the background. This made me apply a few tips to see if I can bring back the iPhone XR to normal working conditions.

Important: Please apply the following tips only to an iPhone that hasn’t suffered from any liquid or mechanical shock damage. All tips are intended to fix an iOS device that has firmware bug or any other software glitch. Hardware problems require a visit to a smartphone service shop!

How To Troubleshoot iPhone XR With Black Screen

1. Power Source
First of all, if you aren’t sure about the Battery status, plug-in your device to a power source and check if the battery isn’t actually completely depleted. In my case, although I knew that the levels were around 80% I, plugged the device into the wall outlet, without any success though. No charging, the iPhone XR was unresponsive.
2. Shutdown and Power Back On
Secondly, I tried to shut down the device. I pressed and held the Side Button together with one of the Volume buttons. No success, The “slide to power off” screen did not show up, the display remained black.
3. Hard Reset iPhone XR
Next, I attempted to hard reset the iOS device via the following combo:
Press and quickly release the Volume Up button. -> Press and quickly release the Volume Down button -> Press and hold the Side button until you see the Apple logo. Nothing happened, still black screen, still bricked.
4. Recovery Mode Restore
iphone xr with apple logoI did not end up performing an iPhone XR restore in Recovery Mode but I will mention this step if the solution that was useful in my case won’t solve your problem too. When the iPhone needs a Recovery Mode to restore it means that it has a major operating system problem. Damaged system files are repaired while the device is in the Recovery Mode. To be able to perform this fix you need a trusted computer running Windows or Mac, which runs the latest iTunes version available. Of course, that the ideal case is to back up all important files, but if the black screen of death issue takes you by surprise, you most likely won’t have a recent backup available. Nevertheless, here is how a Recovery Mode restore works:
-> Connect iPhone to a computer via Lightning cable.
-> Press and quickly release the Volume Up button -> Press and quickly release the Volume Down button -> Press & hold the Side button until the Apple logo appears. If the apple logo is on your screen, you can release and allow the iPhone XR to boot up normally. If the screen gets black again, repeat the procedure and hold the Side button pressed even after the Apple logo appears on the screen to enter the Recovery Mode. -> Release the Side button only when you see the Connect to iTunes logo on the screen.
-> Perform the restore. Data on your iPhone will be whipped out and your most recent backup will be used for restoring. If you don’t have a backup the iPhone will be set up as new!

How I Recovered My iPhone XR From The Black Screen Of Death

iphone xr powered onThis was the first time ever since my almost 10 years of owning an iPhone when I was confronted with the Black Screen of death issue. It happened with a 256 GB iPhone XR. I had just worked on the device right before this happened. 5 minutes later I tried to pick up the smartphone to set up the alarm for the next morning and the device was dead. At first, I gave it some time to see if it will automatically reboot in the background. I finished the evening preparations and before going to bed I had another attempt. Nothing. So, I started applying the steps described above. At first, I tried to shut down the device. Then to power it back on. I applied the force restart combo. Still nothing. Then I repeated the same steps with the iPhone plugged-in, still nothing. By now I was already thinking about a Recovery Mode Restore. However, with all data loss risks involved, I tried on more time to shut down the device.
Solution: This time I pressed the Side Button together with the Volume Up button. Although the display remained black and there was still no “slide to power off” option, I performed the slide as if it was there. I waited for a couple of seconds then pressed and held the Side Button and miraculously the Apple logo appeared and the iPhone XR booted up normally! Battery percentage levels were at 56% down from +80% in only one hour of black screen!
Tip: The first thing that I did was to update from iOS 12.3.1 to the latest software update available at the moment, iOS 12.4!

Prevention Against iPhone XR Black Screen Issue

The most important thing that you can do in order to keep your iPhone away from shutting down suddenly or becoming unresponsive is to keep the iOS version up to date, especially if you own a new model!
Secondly, make sure that you have updated backups of your device!

iphone x in contact with water

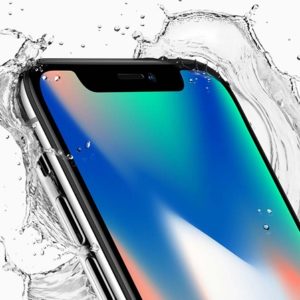
Although we expected the iPhone X to receive the IP68 water resistance rating and match the water tightness of its main competitor the Samsung Galaxy S8, Apple’s iPhone ‘Ten’ remains at the IP67Ingress Protection level. This value is identical with the one received by the iPhone 7 and iPhone 7 Plus models, the first iOS devices to be advertised as water-resistant by Apple.

Early in the year, we predicted that the upcoming 10th anniversary iPhone would get an iP68 rating, motivated by the fact that the elimination of the Home button would make the device more watertight as any other released iPhone. There was no surprise to see that the iPhone 8 and 8 Plus flagships also remained at the IP67 standard, but it’s unexpected for me to find out that the iPhone X can’t match its main rival when it comes to water protection.

Differences Between IP67 and iP68
As explained here, IP stands for Ingress Protection. The first digit shows the dustproofness and can have values from 0-6 while the second digit ranks the water-resistance and varies from 1-9. IP6X devices have the maximum level of dust resistance. The difference between the iPhone X IP67 and the Samsung Galaxy S8 IP68 is that the lower-ranked iOS device is able to withstand 30 minutes submerged in up to 1 meter of water, while the Android smartphone can resist the same time at the depth of 1.5 meters!

Water Damage Not Covered For iPhone X
samsung galaxy s8 splashed with waterAs usual, although Apple advertises the 2017 iPhone flagships as being water-resistant, a potential water damage isn’t covered by the standard 1-year AppleCare warranty that’s included for free when you purchase the iPhone X. Liquid damage is included with AppleCare+ though, but this requires you to spend an additional $199 on top of the device’s 4-figure price tag. Then, if water gets into your iPhone X you have to pay the Other Damage fee of $99.
Fact: Only two incidents are covered by the AppleCare+ insurance. Both Screen Replacement and Other Damage incidents are counted.

Conclusion: Although in most cases it’s safe to expose your iPhone X to water, you better avoid it. If you accidentally drop it the toilet, in your bathtub or bring it near any source of water. take it out as soon as possible and let it dry. You should escape with no damage. Do take into account that water resistance might drop over time as aging kicks in and your device is exposed to temperature differences and various shocks.

blog 31

Recovering data from SIM card

When it comes to the First and Second generation of the iPhone, you have to first take out the SIM tray with a small paperclip. Then remove the screws on both sides of the charging spot and take off the back cover using a little force. Detach the ribbon cable that connects the case to the motherboard and remove the display panel using a spudger. The motherboard had to removed after you have located and removed about 8 screws and a “4” ribbon cable.

Read more “Recovering data from SIM card”

Replacing broken screen

Mobiles phone have become an inseparable part of our lives. We can now surf the web, log onto our social networking websites or just carry out leisure activities for hours on your phones without getting bored.  But, what happens if you are just quietly going through your Whatsapp messages and before you can realize the phone just slips through your hand and its screen shatters to thousand pieces.

Read more “Replacing broken screen”