Fix flickering widgets in iOS 14

Fix flickering widgets in iOS 14

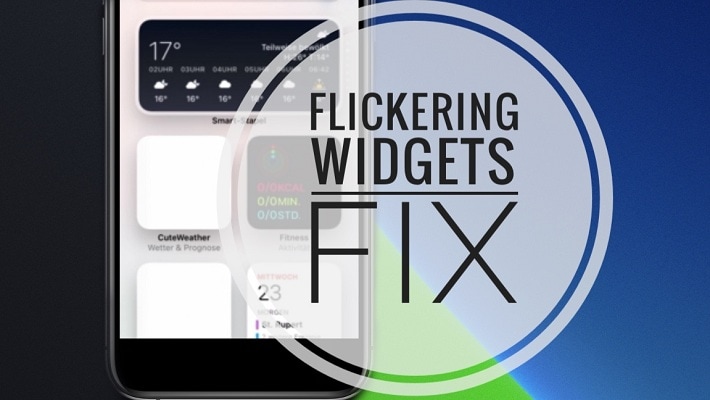
Home Screen widgets have become increasingly popular since the release of iOS 14. However, because this is an entirely new feature, the new iPhone glances come with a fair share of bugs and glitches. Sometimes the widgets turn grey, display a black screen or don’t load any data at all.


Widgets can also start flickering in a continuous loop! The flashing doesn’t stop until you delete the widget. Intermittent blinking can occur both on the Home Screen, as well as as in the Add Widget panel. This bug generates a system-wide reaction, causing all your widgets to flicker, making it difficult for you to determine which one causes the problem.

What Causes Widgets To Flicker?

According to Jamie, on Stackoverflow.com, the intermittent widget flashing is caused by apps that use custom fonts.

Some of the most popular third-party apps that use this option are Widgetsmith and Color Widgets.
The flickering is often triggered after installing app updates or when the user re-configures a widget in its main app.

According to user mpmontanez (from Apple’s Developer forums) the flashing widgets issue occurs when iOS 14 tries to serve a cached version of a widget while initializing the updated one.

3 Ways To Fix Flickering Widgets

1. Reboot iPhone

Users have managed to stop the intermittent flickering of the widgets by force restarting iPhone. Quickly press and release Volume Up button, do the same with Volume Down and press & hold the Side button until the Apple logo is displayed on the screen. Release Side button and wait for the iPhone to boot up.

2. Re-Install Faulty Widget App

Flashing usually starts when you update, add or edit a widget. Long-press on the widget in question and remove it from the Home Screen, to stop all other widgets from blinking. Next, delete the app the causes the flashing problem and re-install it to prevent the flickering bug from re-occurring.

3. Remove Color Widget

We found that in most cases Color Widgets is the app to blame for causing the flickering widgets bug. Perhaps because it heavily relies on custom widget.
In our case, we recently updated to version 1.4.9 and all the widgets on the Home Screen started blinking after adding a new color widget.
Fix: The solution was to remove the widget in question. Re-configuring it from the Color Widgets app did not solve the problem and we ended up deleting the app and re-installing it.

Do you also have problems with flickering widgets in iOS 14? Have you found other troubleshooting solutions? Let us know, with the help of the comments section available below.

App Store Increased Subscription Price notification

App Store Increased Subscription Price notification.

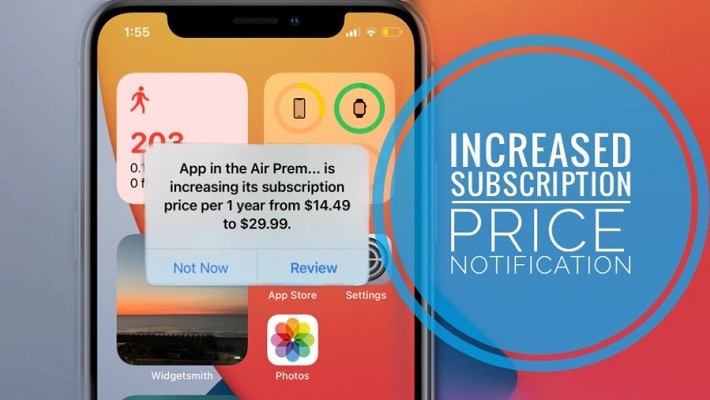
iOS and iPadOS 14 will inform you whenever a third-party app that you’re subscribed too, increases its subscription price! A prompt is displayed on your iPhone or iPad screen mentioning the name of the app in question, the type of the subscription that’s getting the price increase, as well as the full details about the old and the new costs.


The default subscription price increase prompt reads like this:

[app name] is increasing its subscription price per [duration] from [former price] to [new price].

Tap Review, to read more info about the reported price increase and even cancel your upcoming renewal, if you’re not willing to pay the higher price.
You can also tap on Not Now and dismiss the alert if you’re OK with the change or don’t have the time to address this.

How To Manage App Store Subscriptions

If you accidentally pressed Not Now, and are looking for a way to read more about the subscription’s rate increase and even cancel it here is what to do:

how to manage App Store subscriptions


  • 1. Open App Store on your iPhone and iPad.
  • 2. Tap on your Profile‘s icon, upper-right corner of the screen.
  • 3. Open Subscriptions.
  • 4. Tap on the app name, in the Active subscriptions list.
  • 5. Review the new fee and Cancel Subscription if you don’t accept it!

Increasing subscription price notifications are mandatory in iOS 14! Third-party apps have to let their users know whenever a price increase is operated. This way ripoffs are avoided! Have you already been prompted with an alert about a subscription that changed its price? Let us know using the comments section available below.

Increased Battery Drain in iOS 14 and watchOS 7

Increased Battery Drain in iOS 14 and watchOS 7.

Are your iPhone and Apple Watch experiencing increased battery drain ever since you updated to iOS 14 and watchOS 7? Apple has recently acknowledged the problem and released a support document that provides a solution for this and a series of other glitches including missing GPS mapping during workouts and other data missing from the Fitness app.


Apple recommends to unpair Apple Watch, back up both your iPhone and wrist-worn device, erase both of them and restore from backups.

Common iOS 14 and watchOS 7 Problems

The troubleshooting sequence should be applied if your devices experience two or more symptoms from the following list:

  • Increased battery drain on iPhone or Apple Watch, or both.
  • Missing workout maps in the Fitness app on iPhone for workouts recorded with your Apple Watch, with GPS-enabled.
  • Activity, Heart Rate, or other health-related apps don’t work or load data on Apple Watch.
  • Fitness app and/or Health app fail to launch or update data on iPhone.
  • The Health app and/or Fitness app is reporting an unreal amount of data storage on your iPhone.
  • The Activity app is showing wrong amount of data storage on your Apple Watch.
  • Environmental sound levels data and/or headphone audio levels data from Apple Watch is missing in the Health app on iPhone.

How To Unpair Apple Watch

how to unpair Apple Watch

    • 1. Open Watch app on the paired iPhone.
    • 2. In the My Watch tab, tap on All Watches.
    • 3. Tap on the ‘i’ icon, next to the watch that you want to unpair.
    • 4. Use the Unpair Apple Watch option.​

Fact: Before your Apple Watch is erased, the iPhone creates a new backup of your device, which you can use later on to restore your smartwatch from.

How To Create iPhone Backup

With iCloud

how to backup iPhone with iCloud

    • 1. Open Settings on your iPhone.
    • 2. Tap your name, available at the top of the screen.
    • 3. Open iCloud.
    • 4. Make sure that Health is enabled, or tap the toggle to turn it ON.
    • 5. Tap on iCloud Backup.
    • 6. iCloud Backup has to be switched ON.
    • 7. Tap Back Up Now and be patient until the backup is completed.

Tip: Double-check to see if the Health data is backed up, in the Health app. Tap on your profile icon, in the top-right corner of the screen. Check the bottom of the screen, and find out when your data was last backed up. If the time is recent you’re good to go, else you have to wait a bit more and check again

With iTunes

You can also perform a full iPhone backup on your computer via iTunes. For more details please tap here.

How To Erase iPhone

With the backups in place you can proceed and wipeout your iOS 14 device:
how to erase iPhone

  • 1. Open Settings.
  • 2. Tap on General.
  • 3. Scroll for Reset.
  • 4. Use the Erase All Content and Settings option.

How To Restore iPhone & Apple Watch From Backup

First restore your iPhone and then your smartwatch as follows:

  • 1. Reboot your iPhone and restore it from your iCloud backup or from the iTunes one, depending on what method you used.
  • 2. After you iPhone restore is completed, open the Watch app.
  • 3. Tap on Start Pairing and wait for the process to complete.
  • 4. Use the Restore from Backup option and select the most recent backup available, when restoring.
backing up iphone via itunes

Backing up iPhone via iTunes

Nowadays all our digital life is stored on our smartphone. PhotosContactsCredit Card information, Online Banking details represent vital information that we use day by day. Some data is available only on the iPhone without having it written down physically. For example, when you save a new contact, you don’t also write it down in your physical agenda, because that’s time consuming.


So, having a backup of all the digital data stored on your iPhone is mandatory. This helps, in the worst case scenario, that you lose or destroy your iOS device. With a backup available, you have a way to recover your data and upload it on a new iPhone. Backups can be done via iTunes or iCloud. The difference is the iTunes ones are saved on the computer used for backing up, while the iCloud ones are stored on the cloud and available for download from anywhere an Internet connection is found.

How To Backup iPhone Via iTunes
Saving a copy of your iOS device and storing it on your computer is a rapid and easy process. Here is what you have to do:

itunes update available prompt

iTunes Update available prompt.

Step 1: Download & Install the iTunes software on your Mac or Windows computer. Click here and a new page with the official iTunes download information opens up. The Apple website automatically detects if you’re using a Mac or Windows machine and provides the appropriate version.
Step 2: Fill in your name, email address and check the software requirements. Click Download now when you’re ready and the file will be saved on your computer.
Step 3: Check the Downloads folder on your computer or Mac and run the freshly downloaded iTunes installer. Go through the regular steps of a setup process and run iTunes on your machine.
Step 4: Provide your Apple ID log-in credentials when prompted. These are the same log-in details that you use on your iPhone with FaceTime, App Store and so on. Now, you’re ready to backup up your iPhone!
Fact: If iTunes is already installed on your computer, skip the above. Just make sure that it’s updated to the latest version.


Step 6: Grab your iOS device and plug it in the USB port of your computer. iTunes will detect it. Let your device know that it’s a Trustable machine.
Step 7: Click on the iPhone icon available in the top-left area of the iTunes interface. It will open the iPhone view.
Step 8: Click Back Up Now and the process starts. The computer displays “Backing up [iPhone name]…” along with a progress bar. The Ongoing backup process is also confirmed on your iPhone by two arrows rotating clock-wise in the top-right corner of the screen. Be patient until it completes. That’s it your iPhone is now backed up.

itunes connected devices button
iTunes backup now button
unfolding iphone itunes backup process

How To Restore iPhone Backup From iTunes
itunes restore backup optionWith a copy of your iOS device available, it’s a piece of cake to restore it using iTunes:
Step 1: Open iTunes and connect your iPhone with your computer via the Lightning cable.
Step 2: Click on your device icon which appears, after being detected, in the top left area of the screen.
Step 3: Click on Restore from iPhone Backup and the process starts.
Step 4: The iOS device will display the Restore in Progress message while, iTunes will display a progress bar on your machine.
Step 5: Before the restoration is completed, the iPhone, iPad or iPod touch reboots itself. Don’t disconnect the device before you check the Home screen and make sure that everything is working fine.

third party home screen widgets in iOS 14

Third-party home screen widgets in iOS 14

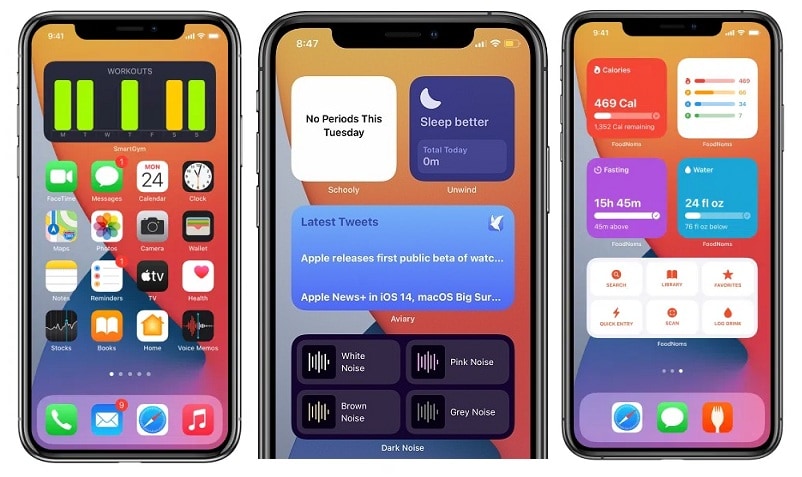
One of the most important changes coming in iOS 14 are the Home Screen widgets. Apple as updated most of the stock iPhone apps with widgets, but also allows developers to add widget functionality to third-party iOS apps. To get them you have to update all your downloaded apps, in the App Store, and check if you get new widgets options in the Add Widgets menu.


In this article we’ve created a collection with the first iOS and iPadOS apps that have update with support for the iOS 14 Home Screen widgets. This is an open list. Feel free to use the comments section at the end of the article to add an app to the collection.

100 Third-Part Apps That Provide Home Screen Widgets For iPhone & iPad

1. Pedometer++ (FREE) – Step Counter
2. DuckDuckGo (FREE) – Privacy, simplified.
3. Card Pointers (FREE) – Maximize rewards & cash back
4. Spend Stack ($3.99) – Lists for expenses & bills
5. Copilot: The Smart Money App (FREE) – Net worth and expense tracker
6. Nudget: Budgeting Made Simple ($2.99) – Quick entry, powerful insights
7. Pillow Automatic Sleep Tracker (FREE) – Alarm clock & sleep analysis
8. Personal Best Workouts (FREE) – Your workouts, ranked
9. HabitMinder (FREE) – Good Habit Tracker & Motivator
10. FoodNoms (FREE) – Count Calories & Track Macros
11. Slopes: Ski and Snowboard (FREE) – GPS Tracker for Snow Sports
12. WaterMinder ($4.99) – Daily Water Tracker & Reminder
13. Calory (FREE) – Calorie Counter & Food Tracker
14. Streaks ($4.99) – The habit-forming to-do list
15. HealthView (FREE) – Health & Fitness Dashboard
16. Unwind (FREE) – Wake Up, Focus, Sleep Better
17. SmartGym (FREE) – HIIT, Home, Gym Weight Lifting
18. Next: Magic DJ & Playlists ($4.99) – Rediscover your music library
19. Soor Music Player ($4.99) – A Beautiful Music Player
20. Apollo for Reddit (FREE) – The award-winning Reddit app
21. Aviary for Twitter ($4.99) – Beautiful micro-blogging
22. TripIt (FREE) – Trip & Vacation Organizer
23. Book Track — Library Manager ($4.99) – Keep track of your books
24. GameTrack (FREE) – Share your gaming life
25. Pocketdex (FREE) IV, Calc, Pokédex, PvP & Raids
26. Pennant (FREE) – Sports standings at a glance
27. LookUp: English dictionary ($5.99) – Learn a new word every day
28. Documents by Readdle (FREE) – File manager, media player
29. Day One Journal (FREE) – Your journal for life
30. PDF Expert: PDF Reader, Editor (FREE) – PDF viewer, converter, notes
31. GoodTask – To Do List Manager (FREE) – Reminders as To-do & Task app
32. Spark email (FREE) – Love your email again
33. Scanner Pro: PDF Scanner App ($3.99) – PDF Scanner, Fac and OCR
34. Drafts (FREE) – where text starts.
35. Calendars: Planner & Reminders (FREE) – Agenda, Organizer. To Do list.
36. Dice ($1.99) – The best random numbers
37. Carrot Weather ($3.99) – The crazy-powerful weather app
38. Weather Line (Free) – Super Forecast & Live Radar

Update 1: September 18
39. Robinhood: Invest. Save. Earn. (FREE) – Stocks, funds & trading tools
40. Coinbase – Buy & sell Bitcoin (FREE) – Secure cryptocurrency wallet.
41. Acorns: Invest Spare Change (FREE) – Investing. Earning. Growing.
42. Bazaart Photo Editor & Design (FREE) – Collage, Edit, Cut, Paste Pics
43. KAYAK Flights, Hotels & Cars (FREE) – Find the best travel prices
44. TripIt: Travel Planner (FREE) – Trip & Vacation Organizer
45. VectorVest Stock Advisory (FREE) – Win Trades. Make More Money.
46. World Clock Time Widget (FREE) – Global Timezone Calculator
47. Mooncast ($2.99) – Moon predictions.
48. Things 3 ($9.99) – Organize your life.
49. Blinkist: 15min Book Insights (FREE) – Business, Motivation, Politics.
50. Bring! Shopping List & Recipes (FREE) – Simple Grocery List and Wallet.

Update 2: September 19
51. Motivation – Daily quotes (FREE) – Positive reminders of the day
52. Parcel – Delivery Tracking (FREE) – Package Tracker
53. Translate Now – Translator (FREE) – Photo, Text, Voice Translator
54. Weather – The Weather Channel (FREE) – Widget with radar forecast
55. IMDb: Movies & TV Shows (FREE) – Tickets, trailers, and ratings
56. Countdown (FREE) – Day Counter: Timer & Widget
57. FotMob – Soccer Scores (FREE) – Scores, video highlights, news
58. Sweatcoin Walking Step Counter (FREE) – Pedometer app to reward health
59. Fitbod Workout & Fitness Plans (FREE) – Home & Gym Personal Trainer
60. Zero – Simple Fasting Tracker (FREE) – Fast for Whole Body Health
61. YAZIO Fasting & Food Tracker (FREE) – Calorie Counter and Diet Diary
62. Lifesum: Diet & Macro Tracker (FREE) – Weight, fitness & sports
63. NBC News: Breaking & US News (FREE) – Breaking News, Live News Video
64. Daylio Journal (FREE) – Super Easy Journal with Stats
65. Night Sky (FREE) – Guide to the Sky Above
66. Microsoft OneDrive (FREE) – File & photo cloud storage
67. Kitchen Stories Recipes (FREE) – Thousands of dishes to enjoy
68. Menstrual Period Tracker (FREE) – Ovulation and Period Calendar

Update 3: September 19
69. Zones for Training (FREE) – Heart Rate Zone Training
70. Debit & Credit (FREE) – Personal Finance Manager
71. Agenda (FREE) – Date-focused note taking
72. App in the Air (FREE) – Fly smarter
73. Twitch: Live Game Streaming (FREE) – Watch Fortnite, PUBG & IRL TV
74. Forecast Bar – Weather + Radar (FREE) – Accurate and Customizable
75. Habitify: Habit Tracker (FREE) – Daily Routine and Goal Tracker
76. Rise: Track Sleep & Circadian (FREE) – Wake up & fall asleep better
77. Period Plus Fertility Tracker (FREE) – Period Calendar Diary
78. Flow by Moleskine Studio (FREE) – Sketch. Think. Create.
79. ETA – Arrive on time ($2.99) – Driving & transit assistant
80. Citymapper: All Your Transit (FREE) – Bus, Subway, Train & MTA times
81. Class Timetable – Schedule App (FREE) – School and college organizer
82. Stepwise Pedometer (FREE) – Step Counter
83. Focus – Time Management (FREE) – Pomodoro for Professionals
84. Calory (FREE) – Calorie Counter & Food Tracker

Update 4: September 20
85. Widgetsmith (FREE) – Custom widgets with a high customization grade for iPHone Home Screen! Hot Widget!
86. Photobox Widget (FREE) – Home Screen Widget!
87. Photo Widget : Simple (FREE) – Add photo widget to iPhone Home screen.
88. Color Widgets (FREE) – Custom Widgets For iPhone. Very popular too!
89. Streaks Workout ($3.99) – For all fitness levels
90. Things 3 for iPad ($19.99) – Organize your life
91. The Weather Network (FREE) – Detailed Weather Forecast
92. Weather Widget & Radar (FREE) – Unique styles weather forecast
93. Zen: Guided Meditation & Sleep (FREE) – Anxiety Relief and Relaxation
94. Ate Food Journal – Photo Diary (FREE) – Mindful, Intuitive & Simple
95. HabitMinder (FREE) – Good Habit Tracker & Motivator
96. TickTick: To Do List & Remind (FREE) – Calendar, Reminders & Habit
97. Due – Reminders & Timers ($6.99) – Never Forget Anything Again
98. Pocket Lists (FREE) – Checklists, Tasks, Reminders
99. Timepage by Moleskine Studio (FREE) – The essential planner app
100. TuneTrack (FREE) – Music Statistics On Demand.
101. Musixmatch Lyrics Finder (FREE) – Lyrics for your music
102. News Break – Local Headlines (FREE) – Breaking & relevant stories

Update 5: September 23
103. TunnelBear: Secure VPN & Wifi (FREE) – Private Network Hotspot Proxy
104. Merriam-Webster Dictionary (FREE) – Dictionary.
105. Usage: Activity & Data Monitor (FREE) – Deep, insightsful, all-in-one
106. Stats: For Model S/X/3/Y ($34.99) –
107. Replica: Mirror Fire Stick TV (FREE) – Mirroring Android & Chromecast
108. Launcher with Multiple Widgets (FREE) – Customize your home screen
109. VinylBox – Scan Records (FREE) – Track your vinyl with Discogs
110. OpenTable (FREE) – Find Restaurant Reservations
111. MyWeather – 10-Day Forecast (FREE) – Widget, Notification & Themes
112. Quit Anger: Anger Management (FREE) – Mental Health & Selfcare Tools
113. Pocket Yoga ($2.99) – Practice yoga anywhere
114. Google (FREE) – Search news, images and videos
115. Yandex (FREE) – Fast and secure browser
116. Eventime – Event Countdown (FREE) – Countdown widget for iPhone and iPad.

iPhone 11 experiencing Camera black screen problem

iPhone 11 experiencing Camera black screen problem.

Your iPhone can do a lot of things, but one of the most popular one is its ability to take spectacular photos and videos. If you’re an average user you don’t even need a dedicate photo camera anymore. The iPhone, as well as the entire smartphone industry has benefited from huge tech-leaps, that now allow users to easily and quickly snap all important moments in their lives.

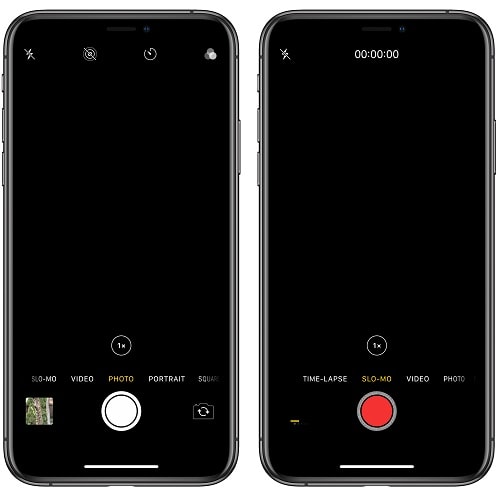
However, nothing is perfect in this world, and neither your iPhone. In rare cases, it can happen that you want to shoot a photo or record a video, but the Camera app malfunctions and displays a black screen instead of the viewfinder! The iPhone’s camera can act like frozen, stuck, out of focus and unresponsive. If that’s the problem that you’re dealing with, don’t panic! You’re not the first one. This issue has already occurred to many others, including us. Read on and you’ll learn how to fix it!

5 Tips To Fix The Black Screen iPhone Camera Problem
In most cases this issue is caused by a software glitch. That’s probably your case too. If your iPhone’s camera would experience a hardware problem, iOS would be able to detect it an display a warning message on the screen. Let’s see how to fix the iOS Camera black screen:
how to switch between iPhone front and rear camera1. Switch Between Cameras
The first fix that you can apply is to tap the flip-camera icon, available in the bottom-right corner of the screen (when holding the device in portrait view).
In some cases, the front-facing camera fails to activate and could output a black screen in the process. However, if you switch to the rear facing camera the viewfinder might start to display properly.
If that’s the case, you can switch again and check if the selfie-cam is working normally again.

how to close Camera app on iPhone2. Close / Reopen Camera App
If you have lots of processes ongoing on your iPhone and open the Camera app with a sudden gesture, it might happen that the software doesn’t boot up properly. This will cause the viewfinder to display a black screen. To fix it you will have to force close the Camera app and reopen it.
How to: Swipe-up from the bottom of the screen to bring up the iOS App Switcher.
Fact: For owners of iPhones with a Home button, you have to double-click it, to bring unveil the App Switcher.
-> Slide-up the card with the Camera app. This has closed the software for good.
-> Now, go back to the Home screen and tap on the Camera icon to reopen it.

how to initiate FaceTime call3. Try To FaceTime
If you performed the two steps listed above an the Camera is still showing a black screen you can try to use the Camera via a different app. Video calling is a good option. Your first choice should be an iOS stock app, FaceTime. Open the app and pick a close contact that you can use for debugging your device’s camera. Initiate the call and see if the Camera unfreezes.
How to: Open FaceTime -> pick an entry from the Recent Calls list or tap the “+” icon available in the top-right corner of the screen to search for a contact. -> Initiate FaceTime call.
Fact: Other video calling apps available are SkypeWhatsAppZoom, but we’ve received positive results with FaceTime for iOS.

how to power off iPhone 114. Restart iPhone
In some cases step 3 is the winner, but in others you’ll manage to have a successful FaceTime video call and as soon as you hang up and open the Camera app you get the black screen again! In this case your next option is to power your iPhone off and turn it back on, with the hope that a reboot should fix this glitch.
How to: Press & hold the Side Button and the Volume Up button of your iPhone until the “slide to power off” screen is displayed on your device -> Perform the slide to the right and turn of your iPhone. -> Wait for a few moments before you press & hold the Side Button again. This time until the Apple logo flashes on your screen. -> Release and wait until the iPhone boots up. -> Provide your Passcode and check if the camera is back functional!
Fact: iPhone users with a Home button just have to press & hold the Sleep/Wake button to reach the shutdown screen!

how to disable iphone voice-over feature5. Disable Voice-Over
Most of the camera black screen problems should be solved by now. If your iPhone still refuses to open the Camera app properly there is one more trick that you can apply. The iOS Voice-Over feature is sometimes a trigger for this glitch. Let’s check if it’s active on your device:
How To: Open the Settings app -> Tap on Accessibility -> Select Voice Over and make sure that the feature is disabled!
Fact: All fixes provided on this page also work for the iPad Camera black screen issue!

Additional Troubleshooting
If none of the above managed to fix your iPhone Camera black screen, there are a few more options to check before deciding to bring your iOS device to a repair shop:
how to disable Location Services for CameraA. Disable Camera Location Services
You could also try to turn off the Location Services for the Camera app and see if this will do the trick.
1. Open Settings.
2. Go to Privacy.
3. Select Location Services.
4. Tap on the Camera label and select Never in the Allow Location Access options.

how to reset iPhone to factory settingsB. Reset To Factory Settings
The remaining two options are quite radical more aggressive. Please make sure that you have a full backup of your iPhone available on iTunes or iCloud.
1. Open Settings.
2. Tap on General.
3. Scroll for Reset.
4. Select Reset All Settings and follow the on-screen instructions.

C. Erase All Data And Reset iPhone
Be careful, this option will erase all data from your device. You will be able to restore from a backup or set it up as new.
1. Open Settings.
2. Tap on General.
3. Scroll for Reset.
4. Select Erase All Content and Settings and follow the on-screen instructions.

If nothing works, please contact us

Download iOS 14 Public Beta 2

Download iOS 14 Public Beta 2.

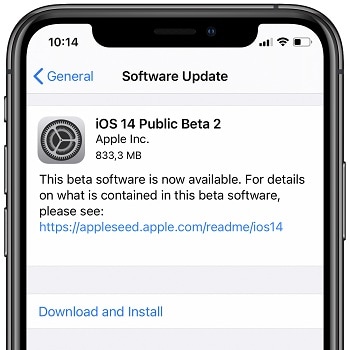
Apple has just released the 2nd beta of iOS 14, two weeks and one day after the first Developer Beta was rolled out, right after the WWDC 2020 keynote. This second beta is labeled iOS 14 Public Beta 2, a solid indicator that the iOS 14 Public Beta release is imminent.
Update: The iOS 14 Public Beta is now available! You can get it via Apple’s Beta Software Program, as long as you follow the step-by-step tutorial available below. If you’re already running the initial Developer Beta just use the Software Update, Settings section to install this new beta.

iOS 14 Public Beta 2 can be easily downloaded over-the-air, as any other regular iOS update as long as you’ve installed the iOS 14 Beta Configuration Profile to enroll your device. The 14th iOS generation brings many spectacular new features to the iPhone including: Home Screen widgets, an intelligently curated App Library that makes all apps installed on your iPhone available in one view, as well as many other highlighted and hidden new features. We’ve intensely beta tested iOS 14 for you and created an open collection with all iOS 14 New features.

Download iOS 14 Public Beta 2 Facts

install iOS 14 Public Beta 2

install iOS 14 Public Beta 2

– If you’re new to this Beta testing program, you should first check if your iPhone is compatible with iOS 14.
– Secondly, before proceeding please make sure that you have a full backup of your iPhone, just in case something goes wrong. The backup is also highly useful if you want to downgrade from the iOS 14 Beta to the most recent public signed version of iOS 13.
– Installing iOS 14 Public Beta 2 works just as any other regular iPhone software update, if you are already running the Developer Beta on your device. In this case you are dealing with a smaller, 833,3 MB large software update file.
– If you want to upgrade from iOS 13, you have to download the iOS 14 Beta Configuration Profile first, before being able to install the iOS 14 Public Beta 2. A detailed step-by-step tutorial is available below.

iOS 14 Public Beta 2 Download & Install Tutorial

Download the iOS 14 Beta Profile

how to download iOS 14 Beta Configuration Profile1. Open the Apple Beta Software Program. Tap here to sign up or sign in.
2. Accept Apple’s terms.
3. Scroll the ‘Guide for Public Beta’ page until you reach the ‘Get Started’ paragraph. Tap on enroll your iOS device!
4. On the Beta Profile page scroll for the ‘Install Profile’ section and tap on Download profile.
5. Tap Allow, to acknowledge the Profile download.
6. Hit Close to finish with Safari.

Install the iOS 14 Beta Profile

how to install iOS 14 Beta Profile7. Go to the iPhone Home screen and open the Settings app.
8. Tap on a new Profile Downloaded available at the top of the Settings home screen.
9. Hit Install, top-right corner of the screen.
10. Enter your iPhone passcode and tap on Install one more time after you read the Consent.
11. Tap Install for a third time and confirm that you want to Restart your iPhone to make sure that the new changes take effect.

Download the iOS 14 Public Beta 2 file

download and install iOS 14 Public Beta 212. After your iPhone reboots open the Settings app.
13. Browse for General -> Software Update.
14. Tap on Download and Install, available on the iOS 14 Public Beta 2 software update screen.
15. Input iPhone passcode and be patient until the 3,95 GB large iOS 14 test version is downloaded and prepared for update.

Install iOS 14 Public Beta 2

If your iPhone remains on the Software Update screen the installation process will automatically begin as soon as the beta is downloaded and prepared for update. Else, you’re prompted with a pop-up message that informs that your iPhone / iPad is ready to start the installation process.
16. Tap Install Now to confirm.
Be patient. Your iPhone will automatically restart when the installation process ends.

Tip: The same software update procedure and tutorial also applies for iPads that are compatible with iPadOS 14 Public Beta 2!

How Long Does It Take To Install iOS 14 Public Beta?

– Be aware that your iPhone has to download an almost 4GB large file. More than that it has to unpack it and prepare it for download. Your Internet connectivity speed has a great impact, but on average be ready to spend up to 1 hour until you can test out the iOS 14 Public Beta.

Install iOS 14 Public Beta 2 Video Tutorial

All the steps presented above are highlighted in the video tutorial provided below. Take a look:

Is iOS 14 Public Beta 2 Buggy?

iOS 14 Public Beta 2 on iPhoneThe iOS 14 Developer Beta was surprisingly stable for a first test version. As most early betas the iPhone battery performance decreased by about 20% under the normal usage.
iPhone would also slightly overheat when multitasking.
We’ve just upgraded our test device to the Public Beta 2 version and are actively testing it. Until now the 2nd Developer Beta (which is the same with the first public beta, and labeled iOS 14 Public Beta 2) is stable. However, be aware that Apple recommends it only for test iPhones and iPads!

iOS 14 new features list
iOS 14 new features

iOS 14 new features

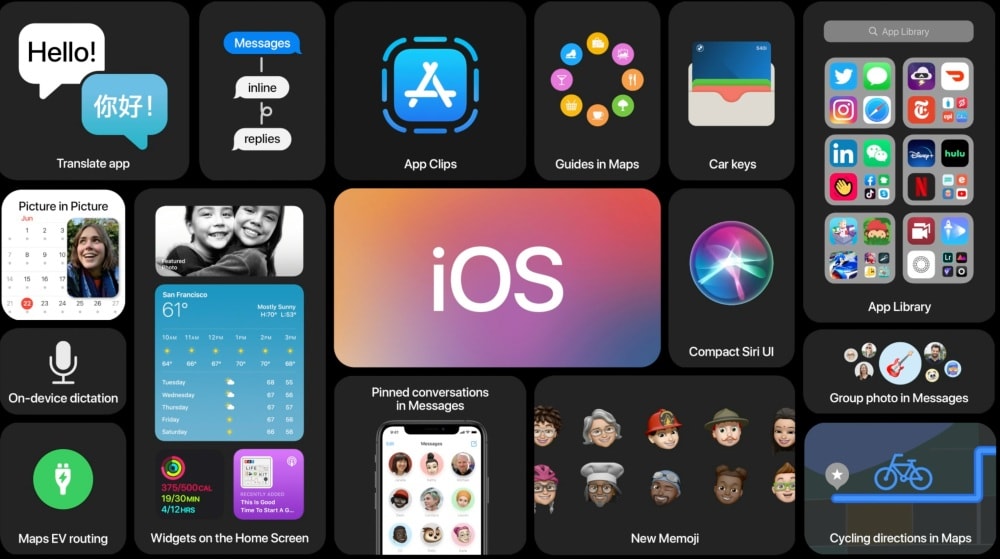
Apple has previewed the 14th iOS generation at WWDC 2020. The splash screen during the keynote highlighted fifteen iOS 14 new features for the iPhone.
The enhancements include the highly useful App Library, rich data widgets, picture-in-picture video playback and much more. All of them are showcased and detailed below.

Besides that, we’re currently testing out the Developer Beta and are looking for hidden iOS 14 features that haven’t been mentioned during the keynote and neither been published on Apple’s website.
This article is an open document and aims to contain a complete collection and include all iOS 14 new features, that will become available for your iPhone this fall!

The 15 Most Important iOS 14 New Features

iOS 14 App Library on iPhone

iOS 14 App Library on iPhone

1. App Library

The iOS 14 App Library is an all new section available on your iPhone’s home screen. It represents the last card of the home page and has the role to provide a single, easy-to-navigate view of all apps installed on your iOS device.
The App Library is automatically curated and knows how to intelligently organize apps to provide easy access to the apps you need at a given time.
Tip: Hide iPhone home screen pages to enhance quicker access to the App Library!

iPhone Home Screen widgets in iOS 14

iPhone Home Screen widgets in iOS 14.

2. Home Screen Widgets

In iOS 14 you can drag & drop widgets from the Today view to the iPhone’s Home screen. The widgets are data rich and come in different sizes to provide useful info at a glance. There’s a new widget gallery that allows you to browse between new widgets and sizes.
You can also create a Smart Stack of widgets. This new iOS 14 feature uses machine learning to display the most needed widget based on time of day, location and activity.
Widgets can be customized for various areas of interest like work, sports, travel, entertainment and more. For more info check out our extended tutorial!

iOS 14 Picture-in-Picture feature.

iOS 14 Picture-in-Picture feature.

3. Picture in Picture

iOS 14 imports this new feature from iPadOS. Now you can start watching a video on your iPhone and continue watching in thumbnail-mode even when you switch for another application or screen.
You can drag the video player in any corner of the screen. Resizing is also very easy.
The picture in picture new feature even supports the pinch to zoom gesture.
Tip: Swipe video player to the side of the screen to hide it, while audio continues to be played in the background. This way you can continue to enjoy the video while tapping into your apps. A detailed look at the iOS 14 PIP feature is available here.

Compact Siri UI in iOS 14

Compact Siri UI in iOS 14

4. Compact Siri UI

Siri gets a complete design revamp in iOS 14. Whenever you speak out something a smaller compact UI is displayed in the lower part of the screen to let you know that the command is being executed.
Siri results appear in the same format as the notifications.
In iOS 14 you can ask Siri to send an audio message. Your virtual assistant knows 3x more facts.

5. On-device dictation

In iOS 14 voice dictation is executed on device, enhancing your privacy and becoming more efficient.

iOS 14 Translate app conversation mode

iOS 14 Translate app conversation mode

6. Translate app

iOS 14 also brings a new stock app to your iPhone. Translate uses powerful neuro-language technology to instantly translate conversations between 11 languages including: English, French, Spanish, Italian, German, Mandarin Chinese, Japanese, Korean, Arabic, Portuguese and Russian.
What’s great is that the app works offline which ensures that your conversations are kept private.
Tip: Turn iPhone into landscape orientation to activate the handy Conversation mode. Check our Translate app how to article to get more detailed info about how to use this new addition.

iOS 14 Messages with inline replies, mentions and group photo

7. Messages Inline Replies

The iOS 14 new features list continues with the inline reply option that’s added to the stock Messages app. You can now reply directly to a message in a group conversation. View replies in the full conversation or open their own thread for a focused view.
Tip: Mentions are now also available. Tap the name of a group member at the start of your message to make clear that you’re expecting a reply from him / her.

8. Pinned Conversations in Messages

It’s hard to manage conversations when you have many threads in Messages. iOS 14 helps out by allowing you to pin conversations.
Fact: You can pin up to 9 chats to the top of the conversation list.

9. New Memoji

iOS 14 brings new Memoji customizing options. More age groups have been added. You can also choose from over 20 new hair and headwear styles.
Fact: Face covering options to trend with the COVID-19 pandemic have also been added!

10. Messages Group Photo

iOS 14 also allows you to add a visual identity to a group conversation in Messages. You can add a Memoji or an emoji.
Fact: The unique visual identity of a group is interactive as it changes based on the participants that reply.

11. Maps Cycling directions

iOS 14 cycling directions in MapsiOS 14 brings dedicated cycling directions to the native Maps app. Use your iPhone to find new ways to get to your destination.
Fact: Cycling directions take in account elevation, the amount of traffic on the roads. It informs you about stairs and steep passages on your route.
The Cycling directions feature a limited number of cities in the early stages.
Supported cities are: New York City, the San Francisco Bay Area, and Shanghai and Beijing in China.

12. Maps EV routing

iOS 14 also brings EV routing to Maps. This way you can eliminate range anxiety and enjoy a stress free zero carbon emission drive.
Fact: EV routing takes in account route elevation as well as weather to provide accurate autonomy based on the electric car that you’re driving.

13. Maps Guides

iOS 14 adds the new guides feature to Maps allowing you find great places in a new location.

14. Car keys

Our iOS 14 new features list continues with the CarKey option for your iPhone. It allows you to use your Apple smartphone to lock / unlock your car, start the engine and drive off. Apple is currently working with BMW and Ford and plans to expand the digital car key option to many other brands.
Fact: The first car to support the new CarKey feature is the 2021 BMW 5 Series.

15. App Clips

iOS 14 App Clips featureLast but not least in the iOS 14 new features list we have the App Clips. Now you can download just a small part of an app. Save storage space and discover new apps light and fast. A card pops-up on your iPhone screen mentioning the app clip.
App Clips can integrate Apple Pay and you can use the Sign in with Apple feature.
App Clips can be launched from the web, Messages, NFC cards, qr code and a dedicated App Clip code that contains both visual and NFC info.
Fact: App Clips are less than 10 Mb in size. You can download full app from the App Store if you plan to use it often.

16. Redesigned Call UI

ios 14 new call UIThis is a bonus addition to the iOS 14 new features that have been highlighted by Apple during the WWDC 2020 keynote. Although not present on the splash screen provided above, it’s one of the most welcomed changes.
The incoming call alert notification doesn’t take up the entire screen anymore, but slides-in nicely from the top of the screen, similar to a banner notification. This way you won’t miss anything until you decide to take or decline the call.
Fact: The new iOS 14 call UI works both for cellular calls as well as FaceTime, WhatsApp, Skype and other VoIP calls!

iOS 14 Hidden Features

This is an open list. iOS 14 beta testing is ongoing and new features are discovered daily and added to the following list. You can also use the comments section available at the end of this article and share a new feature.

1. Name Bluetooth Devices

how to rename Bluetooth device in iOS 14In iOS 14 you can rename the Bluetooth devices that are paired to your iPhone in order to avoid confusion.
Third party devices can have awkwardly similar names.
Now, you can easily get rid of confusions as soon as you connect your iPhone or iPad to the specific Bluetooth loudspeaker, keyboard or any other similar device.
A tutorial that explains step-by-step how to use this hidden feature is available here.

2. Emoji Search

iOS 14 emoji search iPhone featureIn iOS 14 you’re finally able to search for an emoji, instead of swiping through numerous colums and straining your eyes in the process.
Apple has imported the emoji search bar from macOS and you can now used it on any compatible iPhone. The feature is enabled by default, as long as the emoji keyboard is active on your iOS device. The emoji search bar is displayed right below the Messages app scrubber. All that you have to do is tap the search field and type the name or action of the emoji that you’re looking for.
Emoji search suggestions are also provided to help you out. All the details of this iOS 14 new feature are available here.

3. New Notifications

iOS 14 Apple Watch is fully charged banner notificationiOS 14 brings a series of handy notifications for the accessories that are paired with your iPhone. One of them is the alert for a fully charged Apple Watch. This way you know right away when you can get your watchOS device from the charger.
The Low Power notification for AirPods is also helpful. It let’s you know when it’s time to charger your wireless earphones. These notifications slide in as banners from the top of the screen when the iPhone is unlocked, or display on the Lock Screen if they’re generated when your iOS 14 isn’t active.

3. Sound Recognition Accessibility Feature

iOS 14 Sound Recognition notifications on iPhone Lock ScreenOur iOS 14 new features roundup continues with a very important addition. Sound Recognition allows your device to listens for specific sounds and issue alerts whenever they occur.
This is a great aid for people with hearing problems but not only. There are 14 predefined sounds to choose from, including: doorbell, siren, baby crying, water running and more.
Setup the feature by selecting which sounds your iPhone should listen for. A Sound Recognition on/off switch can also be added to the Control Center.
This and much more can be read in our complete tutorial.

4. Captions To Photos

Add a Caption to photo in iOS 14In iOS 14 you can finally add captions to images available in the Photos app.
The new labels will sync across all your devices, as long as the iCloud Photo Library, is enabled on your other Apple devices.
Captions allow you to find a picture easier, because it integrates with the Photos search option.
How To: add a caption to a photo you only have to open Photos, browse to the image in question and swipe-up to unveil the ‘Add a Caption’ feature.

5. New Status Bar Indicators

orange and green indicator in iPhone status bar (iOS 14)iOS 14 hints you whenever an app is using your iPhone’s microphone or camera.
A new dot-indicator is displayed in the status bar (on the right side of the notch), just above the carrier signal. If the indicator is orange it means that the microphone is used. A green color dot signals the the iPhone camera is active.
You can check which app is using them by swiping for the Control Center. The name of the app is displayed at the top of the Control Center card.

6. AirPods Optimized Battery Charging

AirPods Optimized Battery Charging EnabledOne of the iOS 14 new features that could pass by unnoticed is its ability to smart charge the AirPods.
Optimized Battery Charging was introduced to the iPhone in iOS 13, and more recently to macOS Catalina. The feature extends to Apple’s wireless EarPhones.
iOS 14 is able to learn your AirPods charging routine and start to reduce battery ageing, by charging the earphones to 80% and completing the full charge only when it anticipates that you will need them.

7. Return To Home In Settings

In iOS 14 you can long-press the Back button in the Settings app to return straight back to the home screen, instead of browsing back through each sub-menu branch.

8. Local Network Privacy

In iOS 14, apps need to ask and get your permission to be able to access devices from your local network.

9. Select Photos Privacy Feature

Now you can allow apps access only to a few photos from your library instead of granting access to your entire collection. The setting is called Select Photos

10. Approximate Location for Apps

Another privacy related feature allows you to share only your approximate location with apps that require your location. The feature is called Precise Location.

11. Back Tap iPhone For Quick Actions

One of the most popular hidden iOS 14 feature is called Back Tap. You can find it in the Accessibility section of the Settings menu. Asign predefined quick actions for your iPhone in case you back tap your device twice or three times. 12. Mirror Front Camera


13. Quick Take Video Feature

iOS 14 extends the Quick Take video feature to the iPhone XS, XS Max and XR.

Which are your favorite iOS 14 new features? Let us know in the comments section available below.


30366 49749 Screen Shot 2019 03 28 at 124437 PM l

A new report has unearthed details about a “Apple Genuine Parts Repair” program, which puts Apple service materials in the hands of some companies with fewer restrictions than current service providers may be under.

30366 49749 Screen Shot 2019 03 28 at 124437 PM l

Apple has had a path for companies to become an authorized service provider for decades, with requirements for the program varying dramatically across the years. The new “Apple Genuine Parts Repair” program may be lightening that up somewhat, but there are few firm details on what Apple will require to qualify for the new program.

The report, and leaked presentation slides, published by Motherboard, suggests that the program is already in place at a few vendors. Vendors cited are Mobile Kangaroo in California, Simple Mac in Salt Lake City have access to the program, as well as Makina Technologies in Dubai.

Alleged slide from

Alleged slide from “Apple Genuine Parts Repair” presentation

The program appears to specifically allow repair shops to do things that Apple-authorized centers have been doing for years, without telling Apple. For instance, there are specific prohibitions on swapping in a “known-good” component not from Apple’s stock for troubleshooting, requiring a service replacement part be ordered first.

Specifically, the presentation slides say that providers can “keep doing what you’re doing, with Apple genuine parts, reliable parts supply, and Apple process and training.” Additionally, the details don’t limit the parts to iPhone, iPad, or Mac and include all three.

How the system works now, and where it may change

At present, for most authorized service centers, few if any parts are kept in stock. The remainder are ordered after the diagnostic process is complete, and shipped FedEx to the repair shop. The shop performs the repair, and must return the “core” failed part to Apple for examination, refurbishment and return to service stock, or both.

In the case of a warranty repair, Apple picks up the tab for the difference between the core price and the non-return price. Otherwise, the shop pays the bill, which is then passed to the customer. Core prices are often up to 75 percent the cost of the whole part, ordered new. So, part accountability is important, and Apple has put prohibitions in place to prevent shops from selling directly to customers as a result of abuse in years gone by.

Shops selling parts to users is grounds for a loss of Apple-authorized status — which can be financially deadly. At present, it isn’t clear if the requirement for service centers to perform a “core” swap is retained in the new program, nor if they will be allowed to sell parts directly to customers. It doesn’t seem likely that Apple will loosen either requirement.

It also isn’t clear if there will be an upper line that these providers can’t cross. For instance, Apple may choose to retain the hardware for linking parts after a repair involving something involving the secure enclave is performed. Board-level repair, such as that performed by Louis Rossmann is likely to be frowned upon as well.

Immediate reaction

Apple repair venue iFixit doesn’t think the rumored program goes far enough.

“To start, Apple’s plan appears to be rather limited. We know they’ve talked to big repair chains, but they have not spoken to any of the smaller repair shops we contacted,” wrote iFixit in a post on Thursday afternoon. “If only the large national chains get access to these parts, the independent shops—… get left out in the cold, and will likely lose business as a result. This continues to encourage a repair monoculture that stifles competition, job creation, and innovation in the repair space.”

“Apple would like you to think that independent shops are a sketchy, dangerous minefield of service options that use low-quality parts that can lead to problems down the line. And in some cases, that may be true—but that’s Apple’s fault, not the repair shops’,” iFixit continues. “If Apple would just provide OEM parts to independent repair shops at a reasonable price, these risks would be far smaller.”

Potential sea-change, if accurate

AppleInsider has reached out to Apple for comment, but has not as of yet received a response. Third-party vendors we spoke to after the report was published said that they had heard “rumblings” that such a thing was in the works, but denied having any knowledge that it was imminent.

If the report is completely accurate, it would be the biggest shift in Apple’s repair policies since it started enforcing the rules on authorized repair centers in 1979.

Apple has historically opposed right-to-repair laws in places like California, claiming it would expose company secrets and create safety and security problems. While there are innumerable third-party Apple repair firms around the world, only Apple and its authorized service providers are able to perform full service in a way that doesn’t void warranties. Presently, the company doesn’t provide parts or repair manuals outside of its official network.

Twenty U.S. states have some form of right-to-repair legislation under consideration. Apple is one of several tech companies lobbying politicians to act in its favor.

iOS 13 Find My App.

iOS 13 Find My App.

Apple has decided to merge the Find My Friends and Find My Phone app into a single software intuitively named ‘Find My’. Starting with iOS 13you have a single place where you can search for a lost Apple device or a friend. Besides joining the apps the Cupertino-based tech giant has added a handy new feature that allows you to find misplaced devices even if they’re not connected to a Wi-Fi or cellular network. ‘Find My’ is compatible with iPhone, iPad, Macs, Apple Watch and AirPods.

This is achieved with the help of crowd-sourced location information obtained through the Bluetooth signals of the nearby devices. The Bluetooth signal issued by your device, an iPhone for example, can be picked up by other nearby Apple terminals and relayed back to your Macbook, allowing you to start searching for the missing device. The Find My system comes with end-to-end encryption, meaning that others can’t get the location info and nor can Apple. Your lost devices can only be tracked down by you. For this to work, they need to be connected to the same Apple ID. Of course, you need at least two Apple devices, the lost one and the one used for tracking.

How To Locate Friends and Family With Find My
Find People with Find MyThe Find My app is split into three categories. On the home screen, you can find three tabs at the bottom: People, Devices and Me.
The People tab allows you to locate friends that are sharing their location with you. Their whereabouts are shared on a map. Below the chart, you will find a list of the identified persons as well as info about how far away they are.
Tap an entry to unveil more options. Get directions, contact or schedule a notification for when the person leaves the current location.

How To Find Lost Devices
Find Devices in Find My AppIn the Find My app tap the Devices tab and the list with all your devices will be displayed, just below the map. You can zoom in and out of the map to get a better view of the location. Tap the missing device and you will get the following options: Play Sound, Directions, Notifications, Mark as Lost and Erase this Device.
Directions: Provides valuable info about the location of the missing iOS terminal.
Play Sound: Generates a beeping alert to allow you to detect the exact position of the device.
Notifications: Will generate an alert on your iPhone if the missing device is found and is offline.
Mark as Lost: This will lock your device, disables Apple Pay and brings up contact information on the Lock Screen. As a last resort, there is an option to delete all the data on the device.

The Find My – Me – Tab
Me Tab in Find My appThe third tab of the Find My app provides info about your current location. It also includes toggles for sharing your location and for receiving friend requests. You can also tweak the location updates setting. Do you want to get location updates from everyone that is sharing the location with you or just with specific persons?
Last but not least you have the option to name the current location to make it easier to recognize on the map.

How Apple Devices Without Wi-Fi Or Cellular Data Are Tracked
As mentioned at the start of this article the most interesting new feature of the new Find My app is the option to track devices even if they’re not connected to WiFi or cellular data. However, for this to work you still need an active Bluetooth on the missing device. This means that if the device is powered off, you will be only able to see the last tracked location before the battery died or Bluetooth was turned off. In the Devices list, terminals that are offline have the distance from you displayed with grey color instead of blue. Currently, there is no way to differentiate tracking of the devices. There is no mention that the device was tracked via Bluetooth or thanks to Wi-Fi or cellular data.

Fact: Apple claims that the Find My app isn’t resource intensive. It uses just small junks of data from existing network traffic. This means that it won’t have a significant effect on battery drainage, data usage, and privacy.

Tip: If you have the Family Sharing option enabled all other family devices will be listed below your own devices in the ‘Find My’ app.

FaceTime Attention Correction Feature on iPhone and iPad

FaceTime Attention Correction Feature on iPhone and iPad.

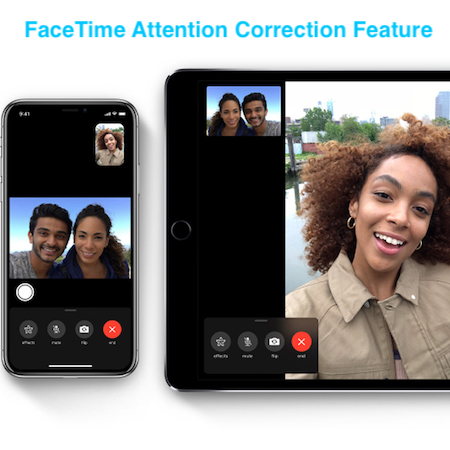
Another interesting new feature coming along iOS 13 is FaceTime Attention Correction. Its role is to make FaceTime video calls more personal by artificially adjusting the set of your eyes so that it helps you to make eye contact with your caller. You probably noticed that every time you are engaged in a FaceTime video call the conversation partner/partners don’t look you directly in your eyes. Naturally, everyone looks at the iPhone’s, iPad’s or at the Mac’s screen, because they want to see what happens at the end of the line.

In order to make eye contact with the other persons, you would need to look both at the device’s camera so that the conversation partner perceives you at looking in their eyes. However, if you do this you won’t be able to see him or her because you can’t look at the same time at the iPhone’s screen and into its cameras. It’s an angle difference that prevents natural eye contact.

FaceTime Attention Correction Feature

How It Works
Starting with iOS 13 Apple has a solution for this small inadvertence. Through a combination of hardware and software improvements compatible iPhone and iPad, models are able to use the front-facing TrueDepth camera to capture an ARKit depth map and artificially “adjust” your eyesight to create the impression that you’re looking at the camera even if you are actually gazing at the iPhone’s screen.

Facetime Attention Correction option in iOS 13 SettingsHow To Set Up
The FaceTime Attention Correction feature is optional. It’s currently not enabled by default. You can turn it on from Settings -> FaceTime -> FaceTime Attention Correction and disable it whenever you want.

Compatibility
You need to own an Apple device equipped with TrueDepth camera hardware and enough image processing power. This means that this feature is compatible with iPhone XR, iPhone XS, iPhone XS Max, and the 2018 iPad Pro models. Your device needs to run iOS 13 or later and iPadOS or later.
Fact: the FaceTime Attention Correction feature doesn’t need both participants to own compatible devices.

Debate
Ever since the announcement of this new feature, an interesting debate has started on the online forms. Is FaceTime Attention Correction actually making the conversation more personal, or it’s actually faking the way you look at your conversation partner? Will we end up in the near future video calling someone and appearing to make eye contact while doing something completely else in the background? Do you plan to use this feature or will keep it disabled?

After years of complaints and shortcomings, Apple has finally listened to the voice of millions of iPhone users that have unanimously complained about the obtrusive Volume interface that pops up in the middle of the iPhone screen whenever you’re watching a video and are trying to adjust the Volume. In iOS 13 gone are the moments when the huge square snapped Volume HUD invades the middle of your iPhone’s display.

The iPad was using the same graphics, however, because of the larger screen size, the old Volume indicator was less obtrusive. In iOS 13 the redesigned Volume HUD is rectangular shaped, oriented vertically and pops up on the left edge of the screen when the iPhone is held in portrait position. It shows up, right next to the physical Volume Up and Down buttons. The new Volume interface becomes even smaller and shrinks to a bar right after it pops up and you continue the adjust the loudness of your iPhone. The new design is slick and unobtrusive. Why did Apple needed several years, to improve this feature? I can’t seem to find a logical answer. Anyhow, it’s better late than never! Right?

iOS 13 new Volume hudiOS 13 New Volume Hud Appearance
Nearby you can have a look at the redesigned iPhone Volume interface. In landscape mode, the rectangular bar pops up, centered, at the top of the screen. It shrinks down as you continue to adjust the loudness.
Fact: At the time of writing there are 34 volume levels to choose from.

iOS 13 Volume Hud Gesture Trick
Besides fine-tuning the Volume levels from the classical buttons you can also apply slide gestures because the Indicator is responsive! Drag the Volume bar up or down (left or right when in landscape) to the desired intensity. Click one of the Volume buttons once, and after the Indicator pops up to use your finger to quickly bring up or down the loudness to the desired levels.
Fact: The fastest way to completely silence your iPhone is still done with the help of the Silent switch available just above the Volume buttons.

iOS 13 Volume HUD On Jailbroken iOS Devices
If you’re using a jailbroken iPhone running iOS 11 or iOS 12 you can now grab the redesigned iOS 13 Volume HUD thanks to a jailbreak tweak provided by developer iKilledAppl3.
Fact: The difference between this jailbreak tweak and the original behavior of the new Volume Hud is that the bar doesn’t shrink and it’s also not responsive to the gesture trick described above.

iphone xr with black screen issue

This post is generated by a recent event that occurred to one of our iPhone models. The XR stopped working all of a sudden and displayed a black screen as if the device shutdown out of the blue. The iPhone XR did not react to the Raise to Wake gesture, to Side Button presses, nor to any other taps on the screen. I have to mention that the battery levels were high (around 80%) before this happened.

The iPhone seemed turned off, and I started considering a shortcut in the battery because it seemed totally dead, as if I was holding a brick in my hand. However, I found out later that it wasn’t the case because I left it to rest for a while and when I picked it up to see if it got resurrected, the brick was warm which means that some kind of loop was definitely ongoing in the background. This made me apply a few tips to see if I can bring back the iPhone XR to normal working conditions.

Important: Please apply the following tips only to an iPhone that hasn’t suffered from any liquid or mechanical shock damage. All tips are intended to fix an iOS device that has firmware bug or any other software glitch. Hardware problems require a visit to a smartphone service shop!

How To Troubleshoot iPhone XR With Black Screen

1. Power Source
First of all, if you aren’t sure about the Battery status, plug-in your device to a power source and check if the battery isn’t actually completely depleted. In my case, although I knew that the levels were around 80% I, plugged the device into the wall outlet, without any success though. No charging, the iPhone XR was unresponsive.
2. Shutdown and Power Back On
Secondly, I tried to shut down the device. I pressed and held the Side Button together with one of the Volume buttons. No success, The “slide to power off” screen did not show up, the display remained black.
3. Hard Reset iPhone XR
Next, I attempted to hard reset the iOS device via the following combo:
Press and quickly release the Volume Up button. -> Press and quickly release the Volume Down button -> Press and hold the Side button until you see the Apple logo. Nothing happened, still black screen, still bricked.
4. Recovery Mode Restore
iphone xr with apple logoI did not end up performing an iPhone XR restore in Recovery Mode but I will mention this step if the solution that was useful in my case won’t solve your problem too. When the iPhone needs a Recovery Mode to restore it means that it has a major operating system problem. Damaged system files are repaired while the device is in the Recovery Mode. To be able to perform this fix you need a trusted computer running Windows or Mac, which runs the latest iTunes version available. Of course, that the ideal case is to back up all important files, but if the black screen of death issue takes you by surprise, you most likely won’t have a recent backup available. Nevertheless, here is how a Recovery Mode restore works:
-> Connect iPhone to a computer via Lightning cable.
-> Press and quickly release the Volume Up button -> Press and quickly release the Volume Down button -> Press & hold the Side button until the Apple logo appears. If the apple logo is on your screen, you can release and allow the iPhone XR to boot up normally. If the screen gets black again, repeat the procedure and hold the Side button pressed even after the Apple logo appears on the screen to enter the Recovery Mode. -> Release the Side button only when you see the Connect to iTunes logo on the screen.
-> Perform the restore. Data on your iPhone will be whipped out and your most recent backup will be used for restoring. If you don’t have a backup the iPhone will be set up as new!

How I Recovered My iPhone XR From The Black Screen Of Death

iphone xr powered onThis was the first time ever since my almost 10 years of owning an iPhone when I was confronted with the Black Screen of death issue. It happened with a 256 GB iPhone XR. I had just worked on the device right before this happened. 5 minutes later I tried to pick up the smartphone to set up the alarm for the next morning and the device was dead. At first, I gave it some time to see if it will automatically reboot in the background. I finished the evening preparations and before going to bed I had another attempt. Nothing. So, I started applying the steps described above. At first, I tried to shut down the device. Then to power it back on. I applied the force restart combo. Still nothing. Then I repeated the same steps with the iPhone plugged-in, still nothing. By now I was already thinking about a Recovery Mode Restore. However, with all data loss risks involved, I tried on more time to shut down the device.
Solution: This time I pressed the Side Button together with the Volume Up button. Although the display remained black and there was still no “slide to power off” option, I performed the slide as if it was there. I waited for a couple of seconds then pressed and held the Side Button and miraculously the Apple logo appeared and the iPhone XR booted up normally! Battery percentage levels were at 56% down from +80% in only one hour of black screen!
Tip: The first thing that I did was to update from iOS 12.3.1 to the latest software update available at the moment, iOS 12.4!

Prevention Against iPhone XR Black Screen Issue

The most important thing that you can do in order to keep your iPhone away from shutting down suddenly or becoming unresponsive is to keep the iOS version up to date, especially if you own a new model!
Secondly, make sure that you have updated backups of your device!

iphone x in contact with water

Although we expected the iPhone X to receive the IP68 water resistance rating and match the water tightness of its main competitor the Samsung Galaxy S8, Apple’s iPhone ‘Ten’ remains at the IP67Ingress Protection level. This value is identical with the one received by the iPhone 7 and iPhone 7 Plus models, the first iOS devices to be advertised as water-resistant by Apple.

Early in the year, we predicted that the upcoming 10th anniversary iPhone would get an iP68 rating, motivated by the fact that the elimination of the Home button would make the device more watertight as any other released iPhone. There was no surprise to see that the iPhone 8 and 8 Plus flagships also remained at the IP67 standard, but it’s unexpected for me to find out that the iPhone X can’t match its main rival when it comes to water protection.

Differences Between IP67 and iP68
As explained here, IP stands for Ingress Protection. The first digit shows the dustproofness and can have values from 0-6 while the second digit ranks the water-resistance and varies from 1-9. IP6X devices have the maximum level of dust resistance. The difference between the iPhone X IP67 and the Samsung Galaxy S8 IP68 is that the lower-ranked iOS device is able to withstand 30 minutes submerged in up to 1 meter of water, while the Android smartphone can resist the same time at the depth of 1.5 meters!

Water Damage Not Covered For iPhone X
samsung galaxy s8 splashed with waterAs usual, although Apple advertises the 2017 iPhone flagships as being water-resistant, a potential water damage isn’t covered by the standard 1-year AppleCare warranty that’s included for free when you purchase the iPhone X. Liquid damage is included with AppleCare+ though, but this requires you to spend an additional $199 on top of the device’s 4-figure price tag. Then, if water gets into your iPhone X you have to pay the Other Damage fee of $99.
Fact: Only two incidents are covered by the AppleCare+ insurance. Both Screen Replacement and Other Damage incidents are counted.

Conclusion: Although in most cases it’s safe to expose your iPhone X to water, you better avoid it. If you accidentally drop it the toilet, in your bathtub or bring it near any source of water. take it out as soon as possible and let it dry. You should escape with no damage. Do take into account that water resistance might drop over time as aging kicks in and your device is exposed to temperature differences and various shocks.

blog 39

Whether you have a broken glass, broken LCD, charging problems or your tablet won’t turn on, bring it to us. We are professional and qualified to carry out such repairs to get it fixed up at the earliest. By using the highest quality replacement parts, we make sure that your device will work like new. We replace only those parts that are required to be replaced and will not burden you with the cost of repair that your tablet do not need. We work on all leading tablets of different brands.

Read more “Laptop & MacBook Damaged charging ports and slots repair”